
1. 项目参考
在网上找了好多wstunnel的安装使用教程,但是都是基于6.0版本或者以前的,而guithub上,该项目的版本已经更新到9.0,因为项目内容重构了,所以6.0版本的相关教程已经不太满足需求,为此本文将介绍基于9.4版本的安装使用流程。
2. 服务端安装
打开项目官方地址:https://github.com/erebe/wstunnel/releases,复制对应版本,在SSH终端中输入以下命令下载程序。
我的服务器装的是ubutun24.02,选择的版本就是linux_amd64。
2.1 下载
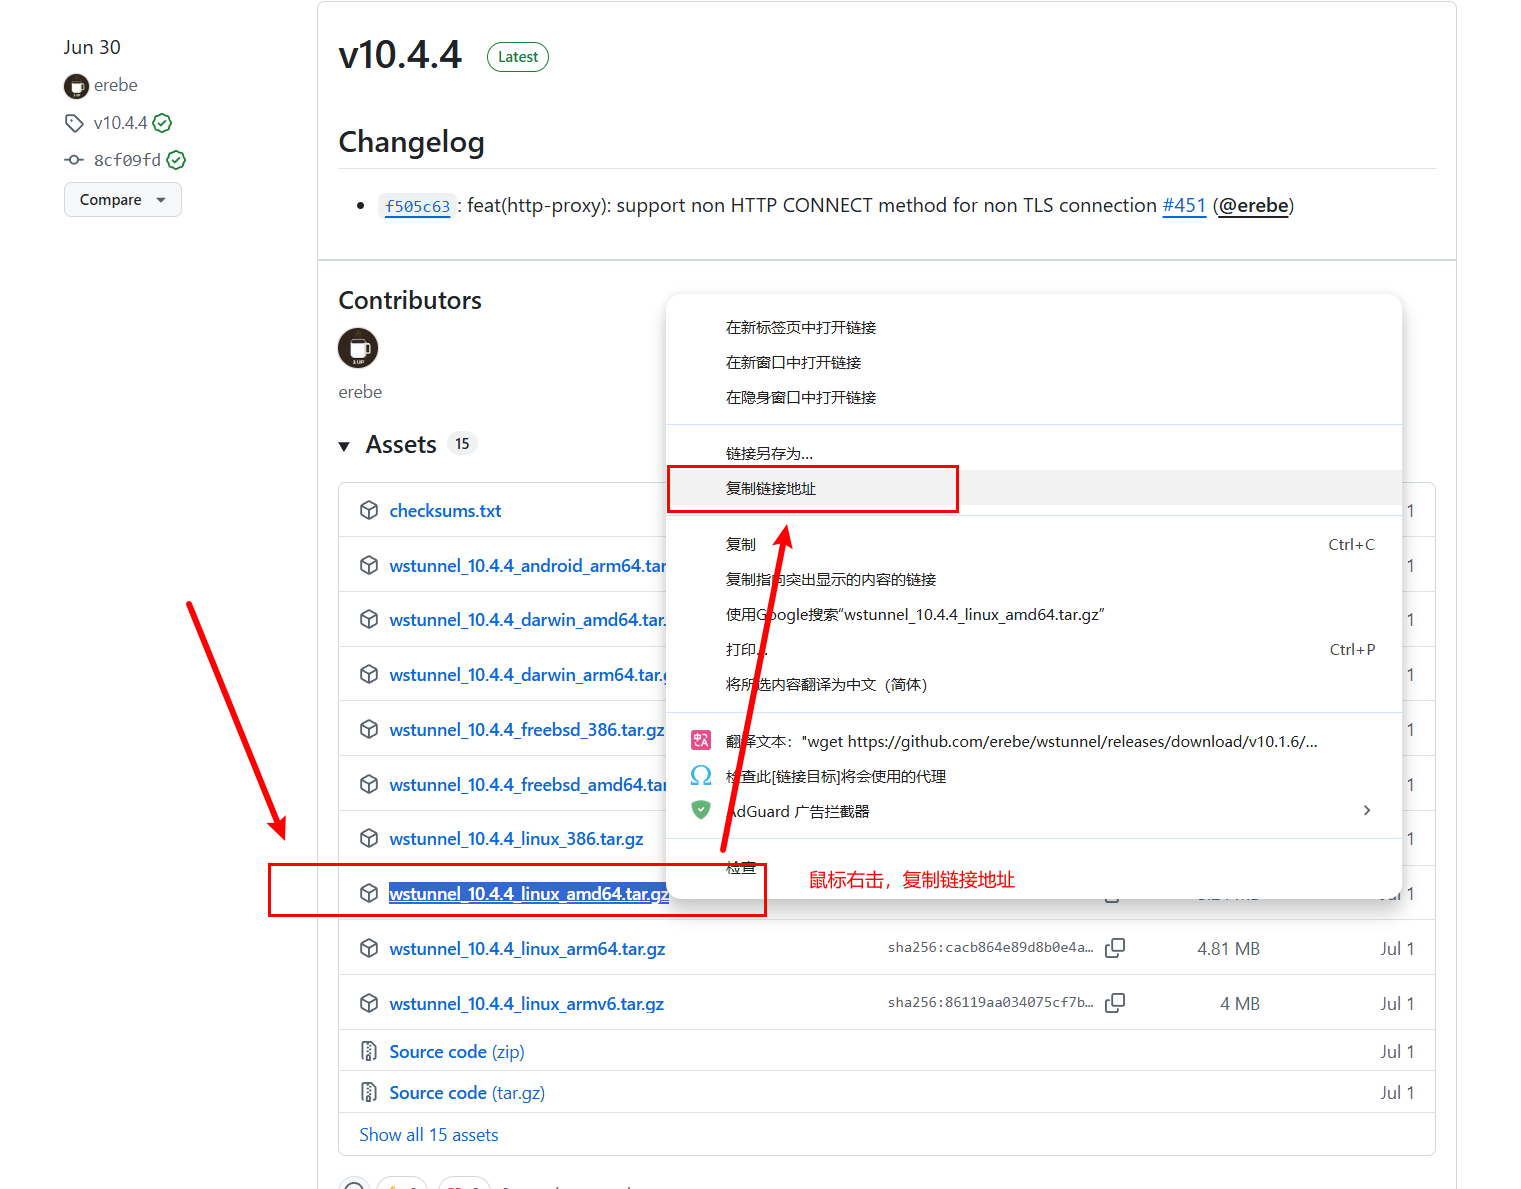
wget https://github.com/erebe/wstunnel/releases/download/v10.4.4/wstunnel_10.4.4_linux_amd64.tar.gz2.2 解压
tar -xzvf wstunnel_10.4.4_linux_amd64.tar.gz2.3 文件赋权并删除压缩文件
chmod 755 wstunnel && rm -f wstunnel_10.4.4_linux_amd64.tar.gz3. 服务端启动
服务端开启wstunnel服务,并指定6789端口
./wstunnel server wss://0.0.0.0:67894. 服务端自启动
设置wstunnel服务为开机自启动。
4.1 创建systemd程序
在/etc/systemd/system/文件夹中,创建一个wstunnel.service文件
通过图形化菜单,创建wstunnel.service文件,或者使用命令行创建wstunnel.service文件
touch /etc/systemd/system/wstunnel.service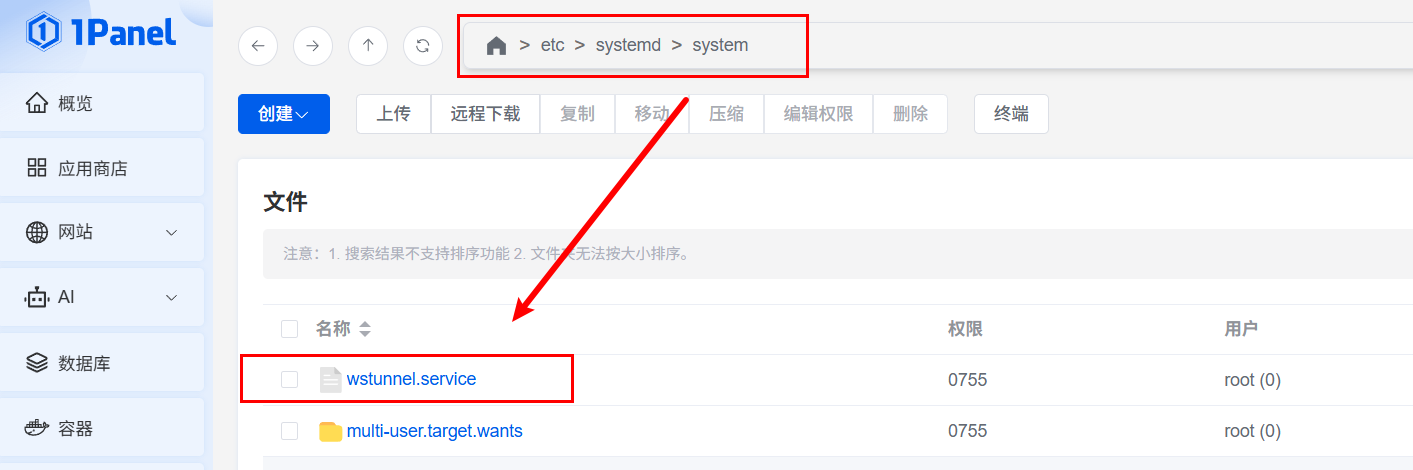
4.2 配置wstunnel.service
单击打开wstunnel.service文件,将代码粘贴至文件中
[Unit]
Description = wstunnel is a tunnel tool that's so simple that you say so easy
After = network.target

[Service]
Type=simple
ExecStart = /root/wstunnel server wss://0.0.0.0:6789
Restart = on-failure

[Install]
WantedBy = multi-user.target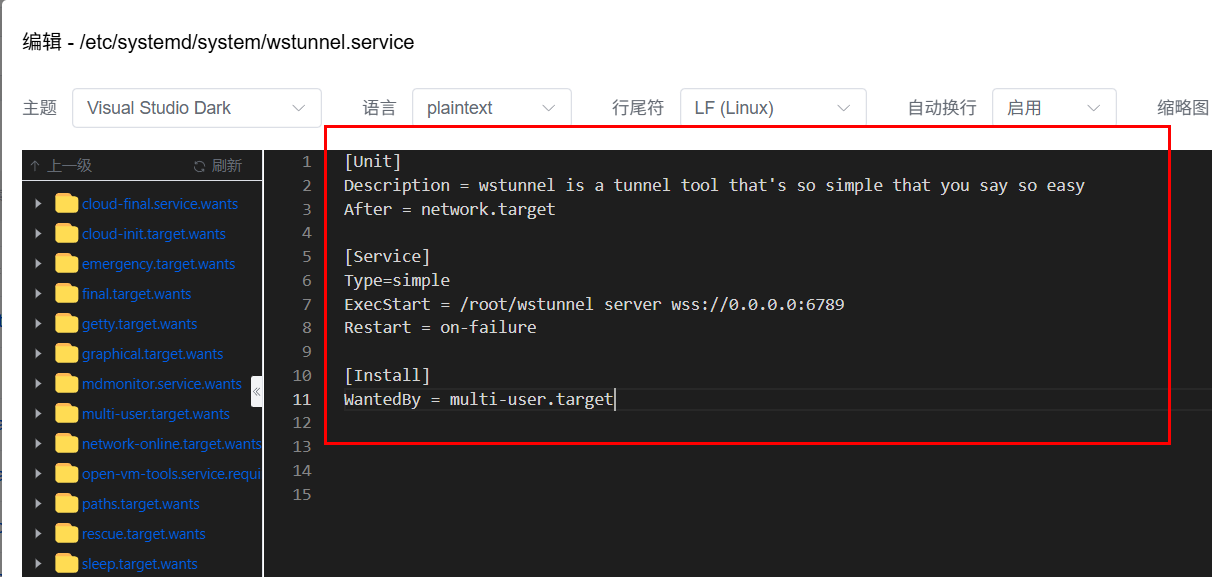
4.3 重新加载systemd守护进程
systemctl daemon-reload4.4 重新加载wstunnel.service
systemctl start wstunnel.service4.5 查看服务状态
systemctl status wstunnel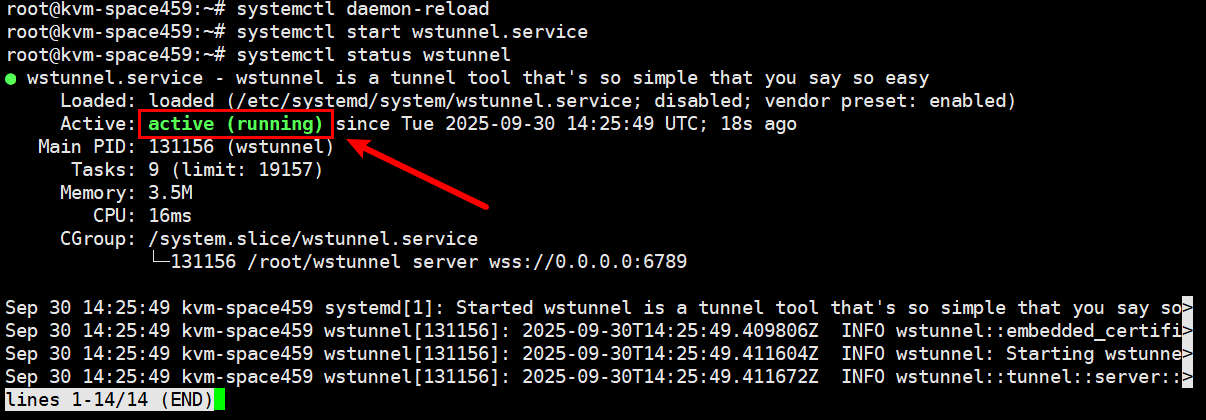
5. 客户端(电脑)安装
5.1 下载Windows客户端
https://github.com/erebe/wstunnel/releases,下载windows_386.tar.gz程序

5.2 客户端启动
进入wstunnel.exe文件夹,打开终端命令行,输入以下命令启动
.\wstunnel.exe client --local-to-remote socks5://127.0.0.1:10099 wss://185.243.240.111:6789wstunnel.exe 是可执行文件的名称
client 表示你想要运行客户端模式
--local-to-remote 指定了本地到远程的转发规则
socks5://127.0.0.1:10088表示使用socks5协议,转发到本地的10088端口
wss://wss://185.243.240.111:6789 是服务器的地址和端口
6. 定制Windows启动服务
通过nssm工具,将wstunnel变为启动服务,这样就不用每次都手动打开,让wstunnel随着电脑开机启动。
6.1 下载NSSM工具
https://nssm.cc,下载客户端
或者下载这个版本,
6.2 解压并配置
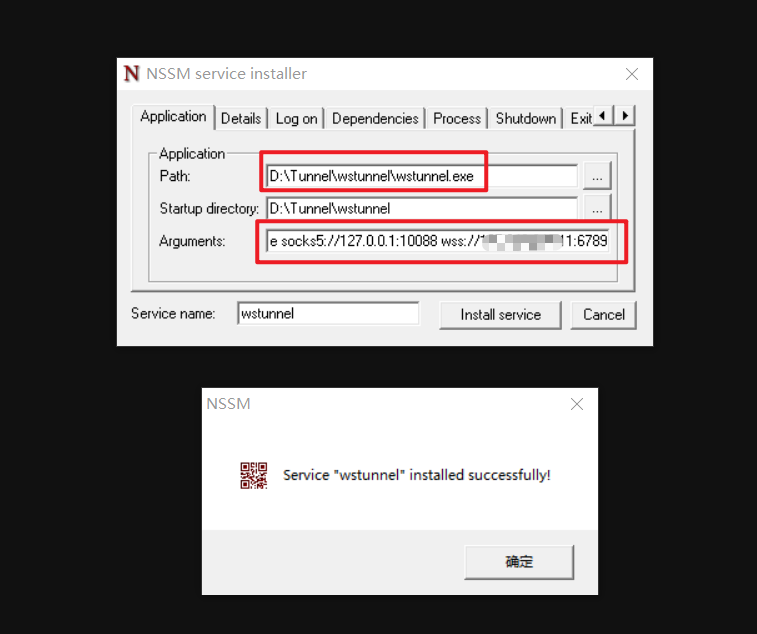
管理员权限打开命令行工具,切换到nssm.exe所在路径,运行 nssm install,打开程序配置界面
E:\nssm-2.24\nssm-2.24\win64>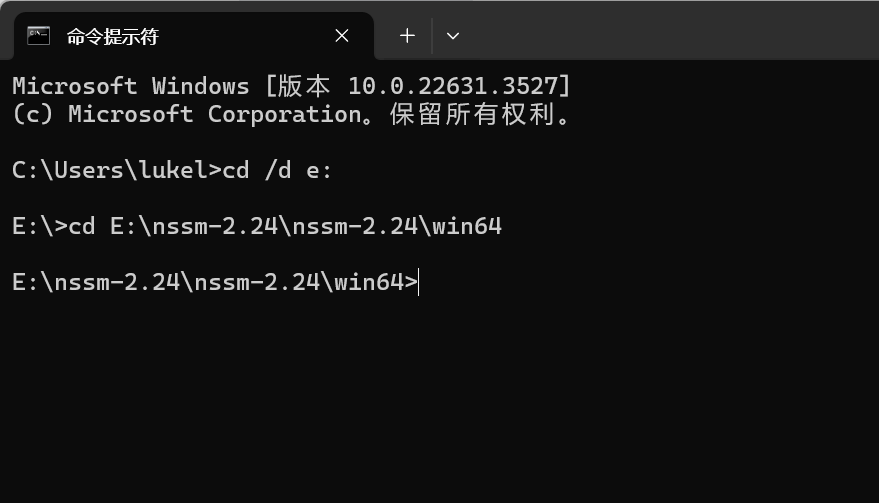
6.3 nssm install
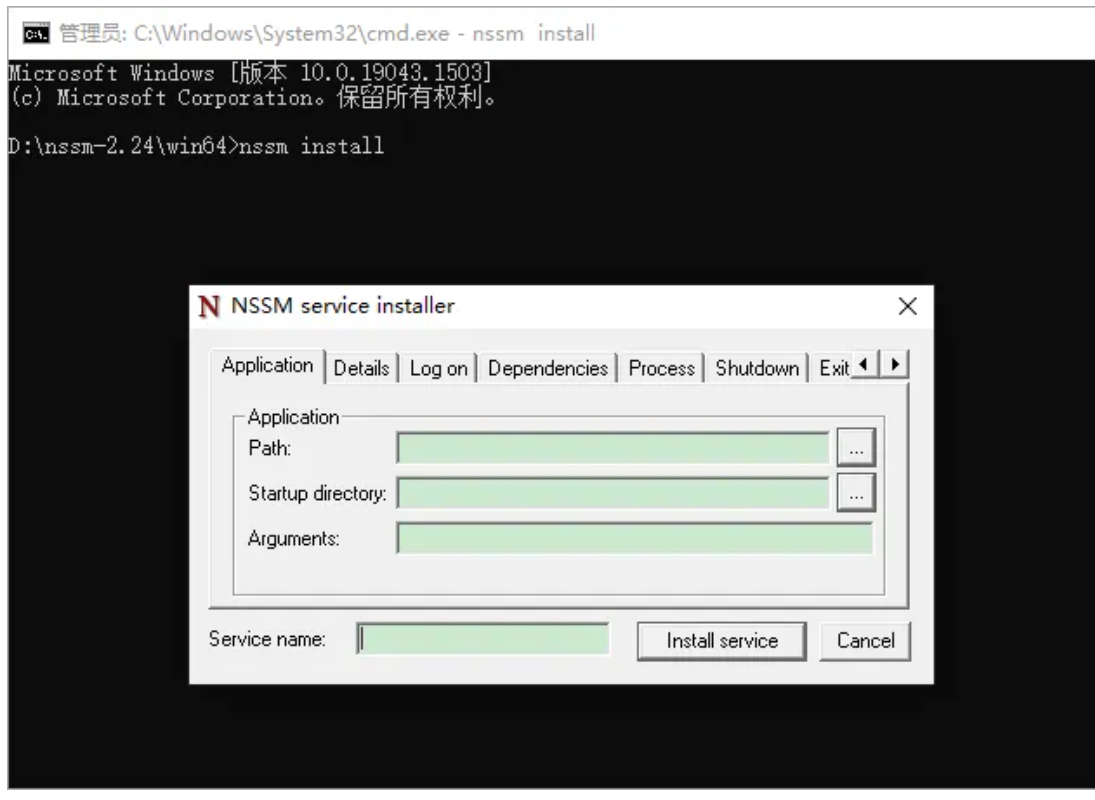
配置项说明:
-
Path:选择wstunnel.exe程序,点击右边三个点进入文件夹内选择。
-
Startup directory:应用程序所在的目录,上一步选择后会自动填写
-
Arguments:应用运行的参数,比如,上面我们需要运行的程序参数是:
.\wstunnel.exe client --local-to-remote socks5://127.0.0.1:10088 wss://185.243.240.111:6789
-
Service name:生成服务的名称,如wstunnel
-
最后点击install service 完成windows服务安装,在windows服务列表就能看到创建的服务了。
6.4 启动服务
nssm start wstunnel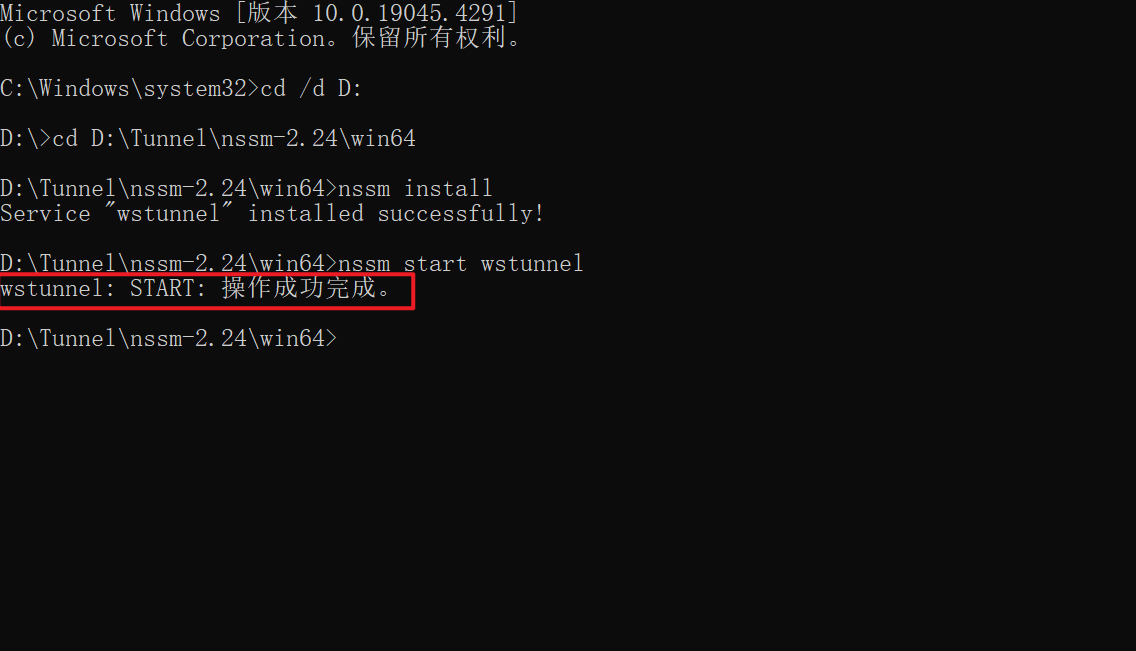
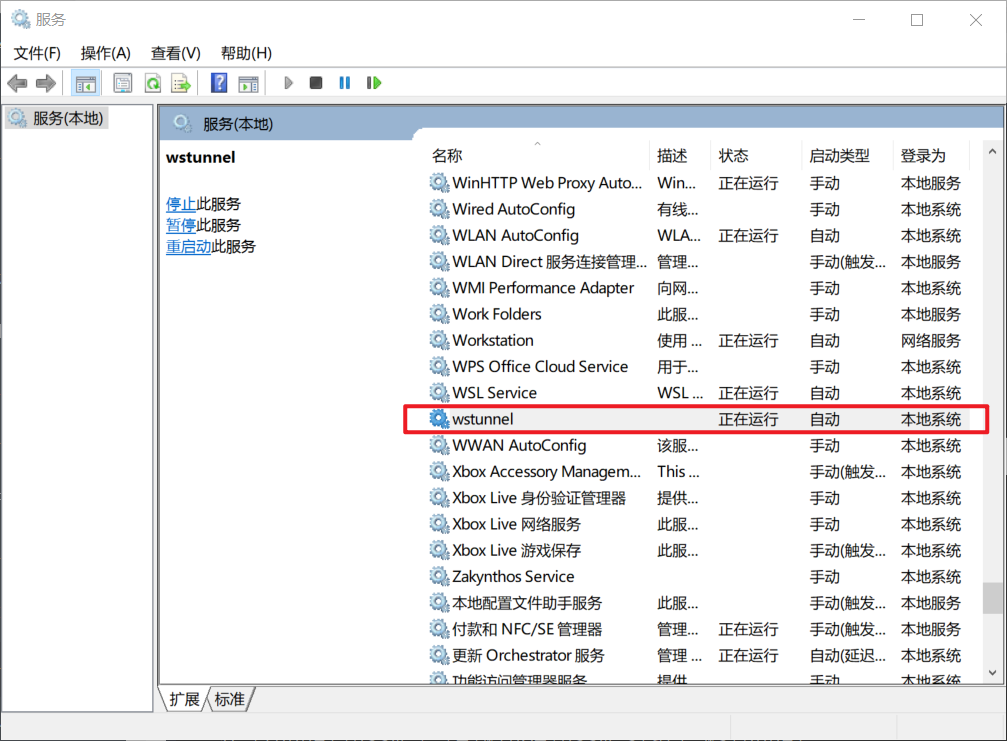
也可以在服务中点击启动,服务信息如下:
6.5 修改服务
如果想要修改服务,输入命令,修改配置,但是修改不了服务名
nssm edit <servicename>
nssm remove <servicename>

E:\nssm-2.24\nssm-2.24\win64>nssm edit wstunnel
7. 浏览器配置
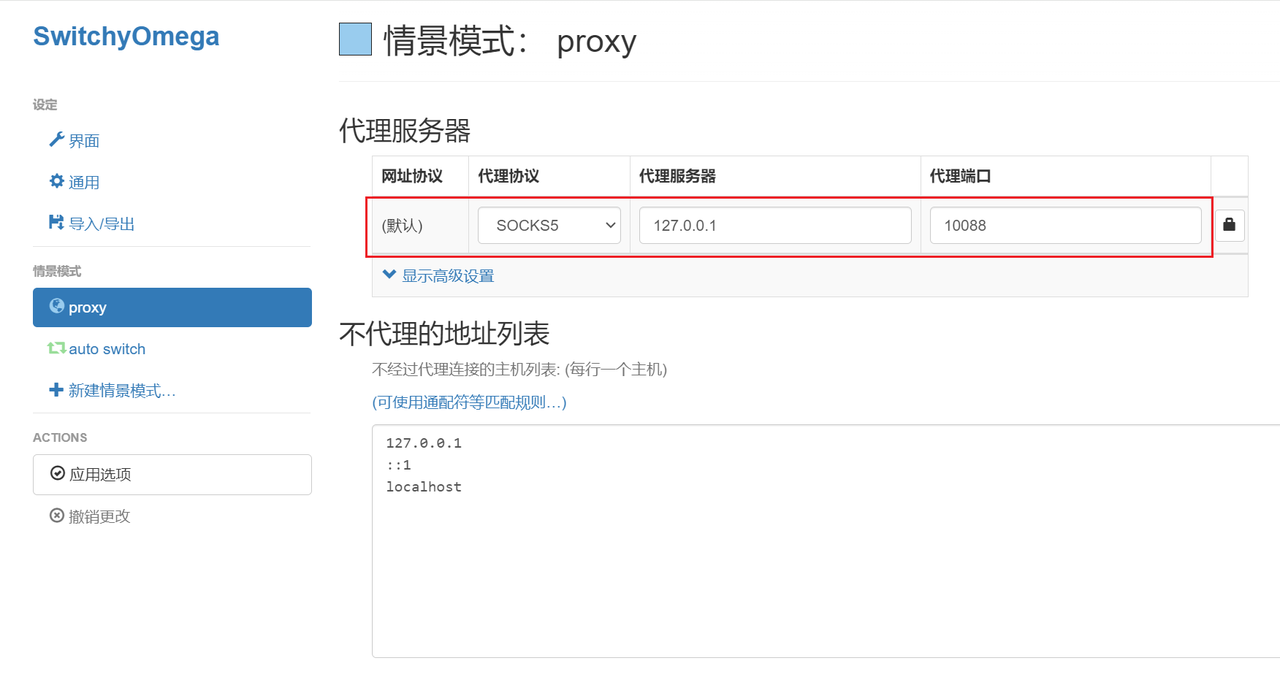
自行下载安装浏览器proxy扩展,在此以Zero Omega配置为例
新建一个情景模式,配置地址和和端口